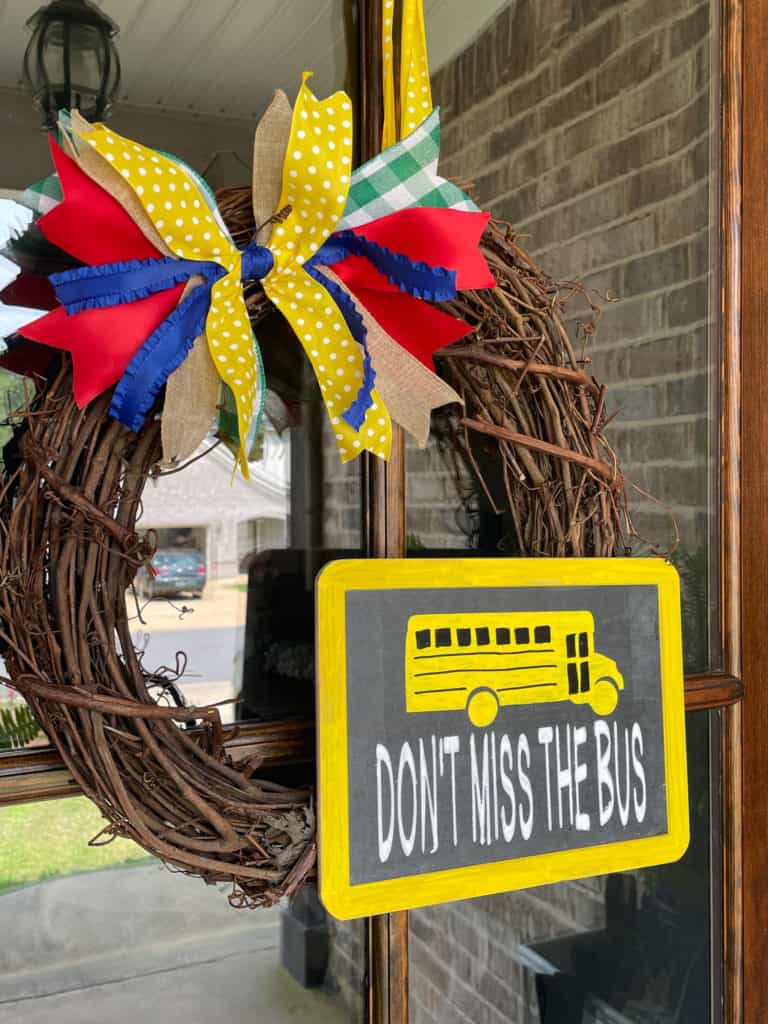
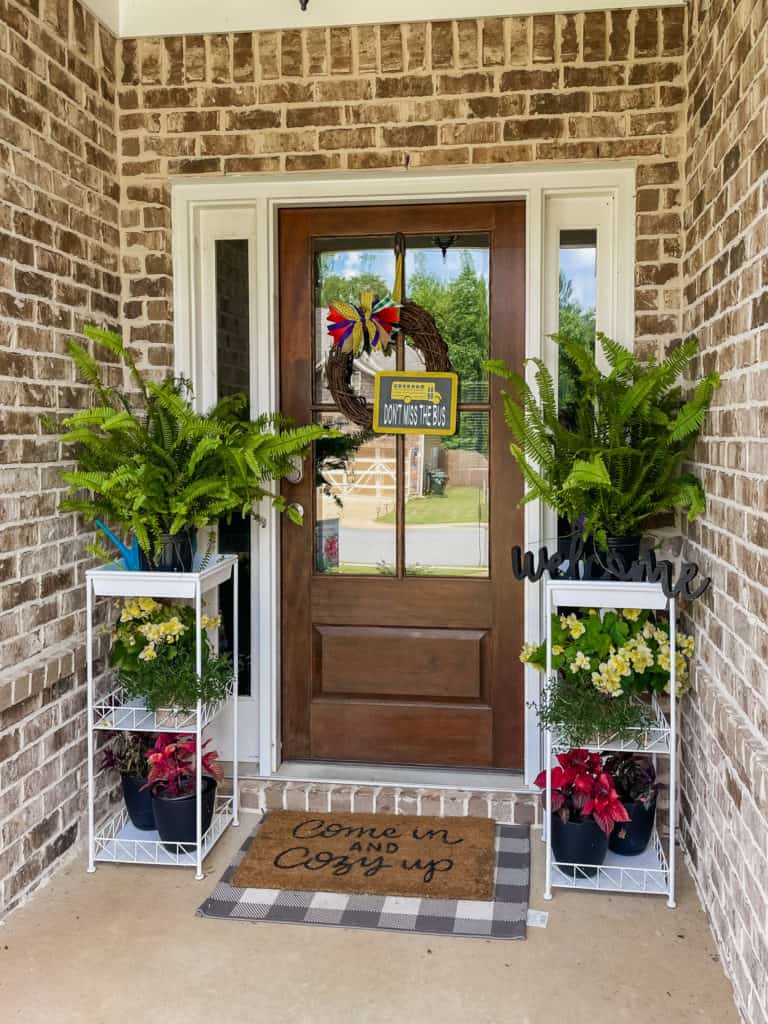
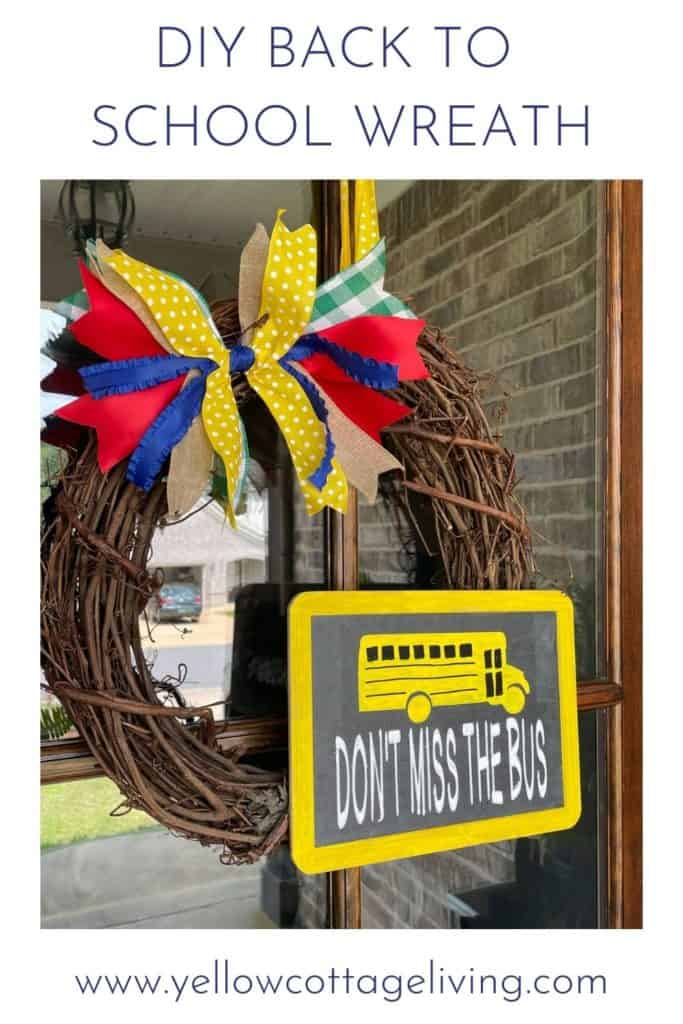
Celebrate the beginning of a new school year with a fun Back To School Wreath using Colorshot paint markers.
*This post contains affiliate links. Any purchase you make through my links allows me to earn a small commission at no additional expense to you.
As you’ve heard, a couple of weeks ago I attended Haven Conference for the first time.
Part of the fun of Haven Conference is meeting other bloggers who become real-life friends.
Another amazing aspect is receiving some really amazing products to try!
This week, some of my new real-life blogger friends and I have teamed up to showcase one of the products we received – COLORSHOT paint markers.

I received the rainbow pack so I decided the best use for them was to create something in the Back To School realm.
I also need a new wreath for my front door so a Back To School Wreath seemed to be the perfect solution.
You should know that no craft or DIY project goes down at my house without some challenges!
I had to do some YouTube searching to figure out how to make stencils with my new Cricut Maker 3.
My yellow paint pen’s tip fell out and I got yellow paint on my hands, pants, desk and phone.
The original ribbon I bought was too flimsy to make the kind of bow I wanted so I had to place an online order at Michaels for different wired ribbon.
All in all, I’m pleased with how it turned out!
I’m sure by now you’re dying to know how you could make one of these masterpieces for yourself!
DIY Back To School Wreath
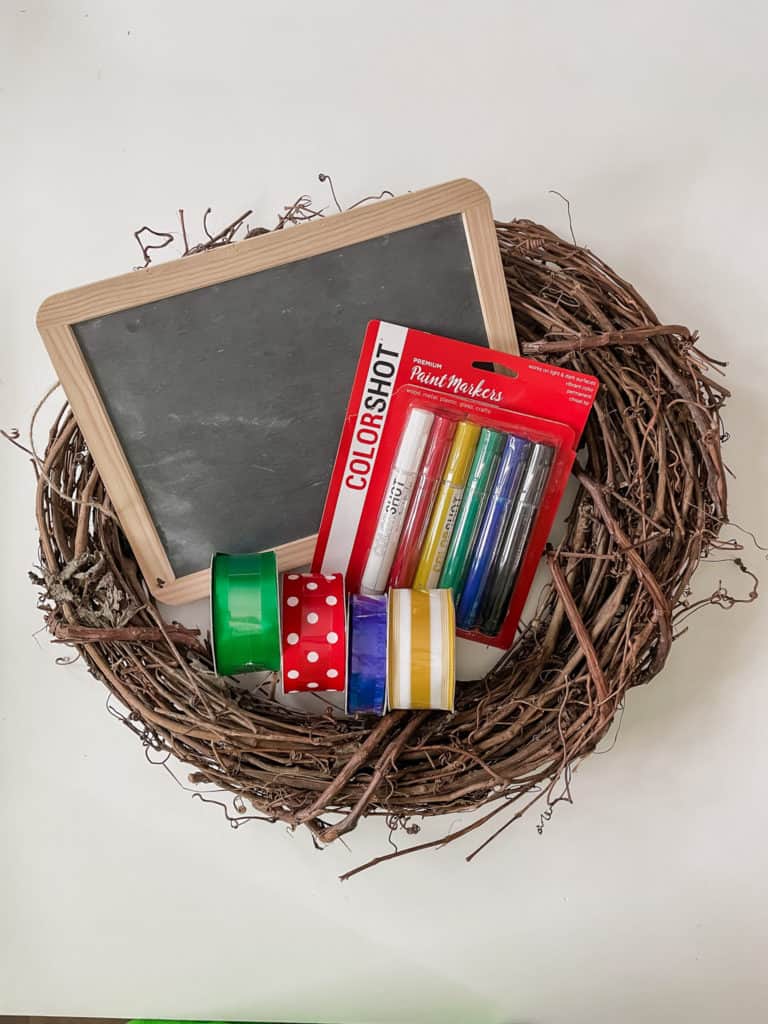
Materials:
COLORSHOT Rainbow Paint Markers
Ribbon (I used these – Green, Red, Yellow, and Blue)
Stencils (I used my Cricut, smart vinyl and sticker cardstock to make mine)
Let’s Make A Back To School Wreath:
- Gather all of your supplies.
- You may notice that the ribbon in my supply picture is different from the ribbon I actually used!
- I had to switch up the ribbon when I realized the original ribbon wasn’t stiff enough to hold in the bow shape I wanted.
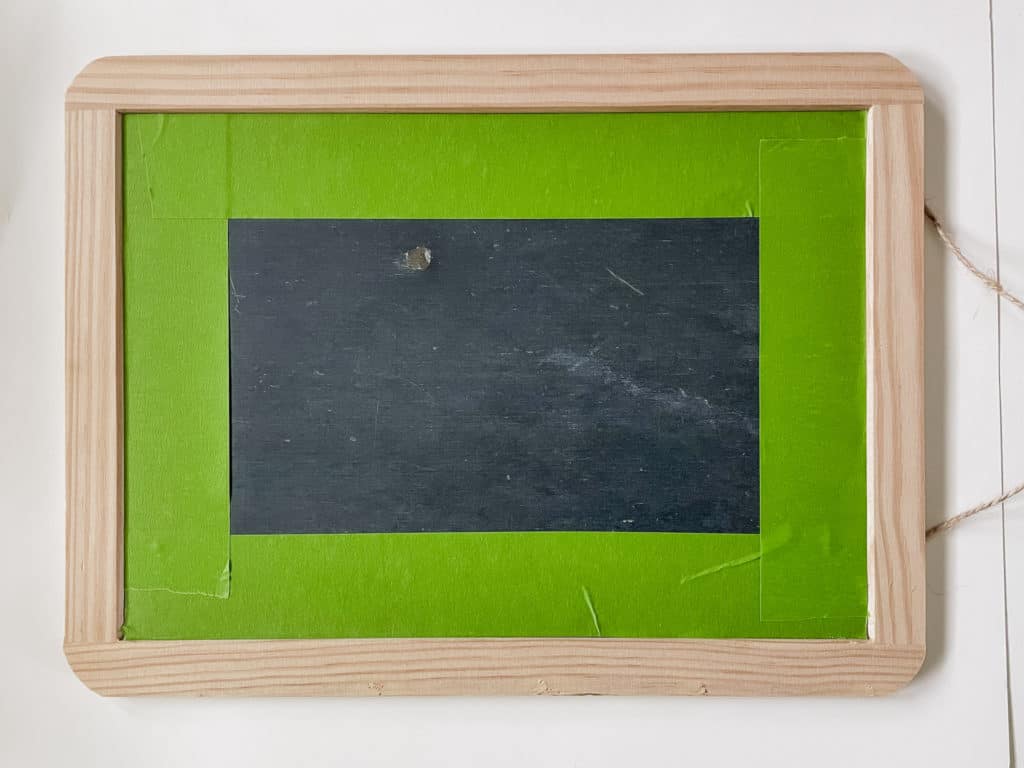
- Decide what you want your chalkboard to say. I wanted mine to be fun and silly!
- Cut your stencil using your Cricut or other crafting machine – or use a store bought stencil.
- Paint the frame of your chalkboard using your COLORSHOT paint markers.
- I used FrogTape on the inside edge of my chalkboard to keep my yellow paint from bleeding onto the chalkboard.
- Apply bus stencil to center, top half of the chalkboard.
- Fill in stencil with color from COLORSHOT paint marker.
- This may take more than one coat.
- Be sure the tip of your paint marker is really well saturated for good coverage!
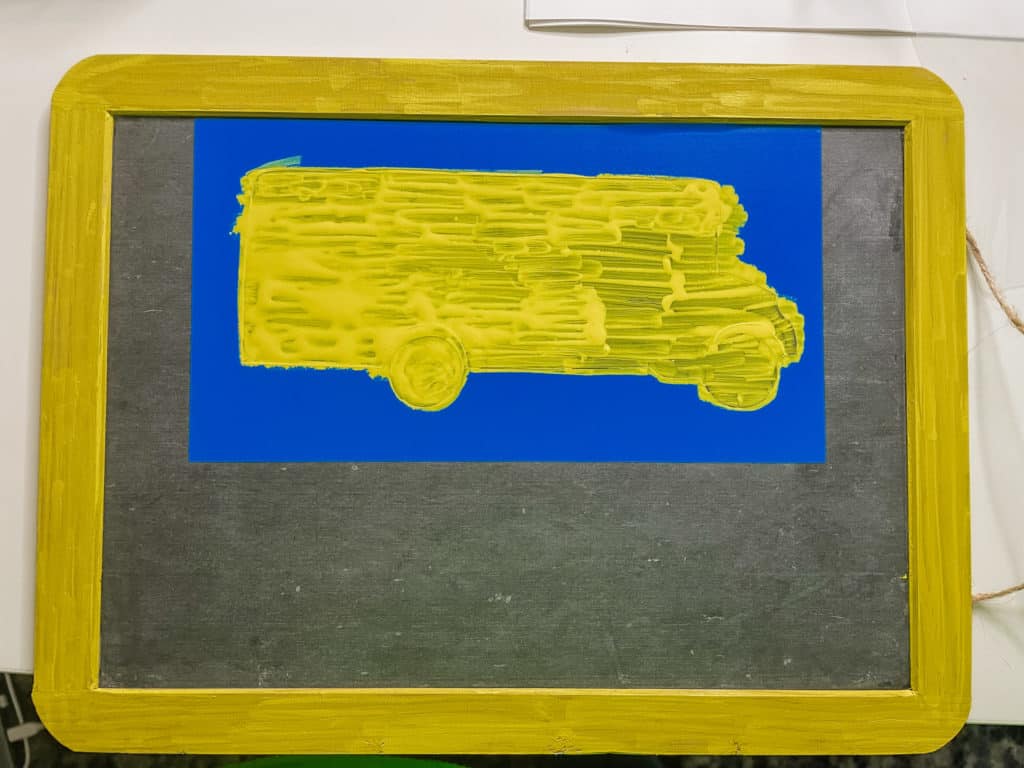
- Gently peel stencil off of chalkboard.
- Let paint dry! (This is the hard part!)
- Apply stencil for your words on bottom half of chalkboard.
- Fill in letters with COLORSHOT paint marker color of your choice.
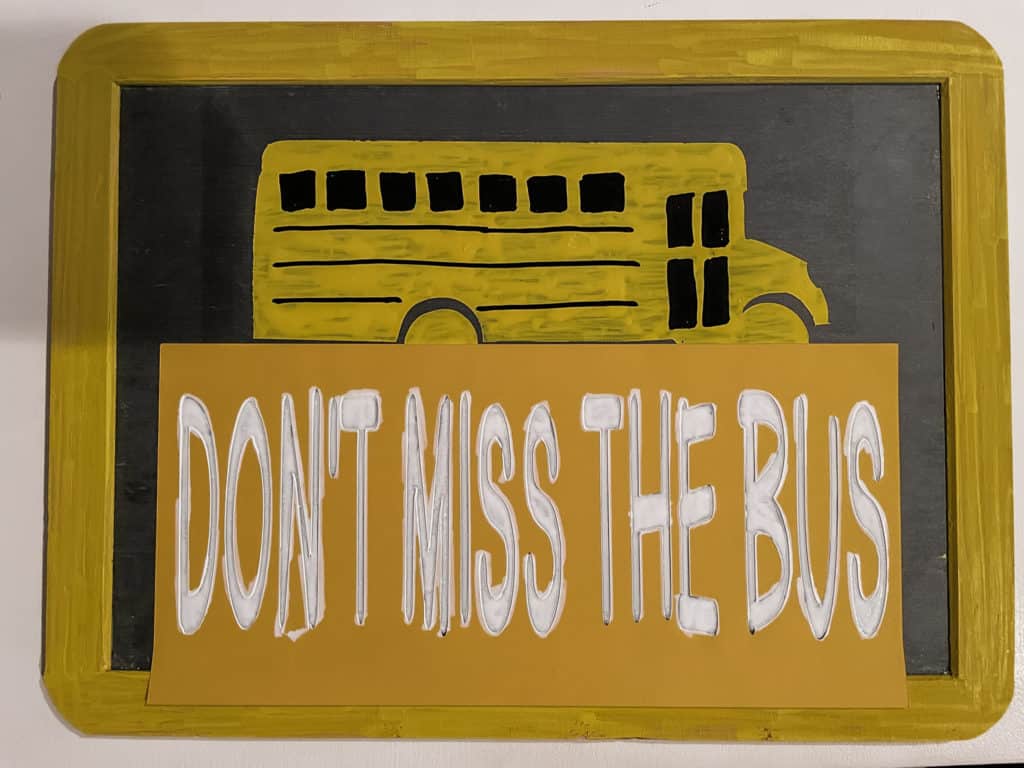
- Gently peel stencil off of chalkboard.
- Let paint dry!
- Create bow for your wreath. I used the Messy Bow technique.
- Attach bow and chalkboard to grapevine wreath using generous amounts of glue from the glue gun.
- Hang Back To School wreath on front door and enjoy!
Want to see other COLORSHOT paint marker projects?
Here are my friends who have created some amazing things using their COLORSHOT paint markers!
Stephanie’s Pizza Pan Back To School Wreath

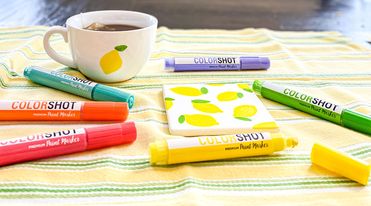
Danielle’s Lemon Mug and Canvas
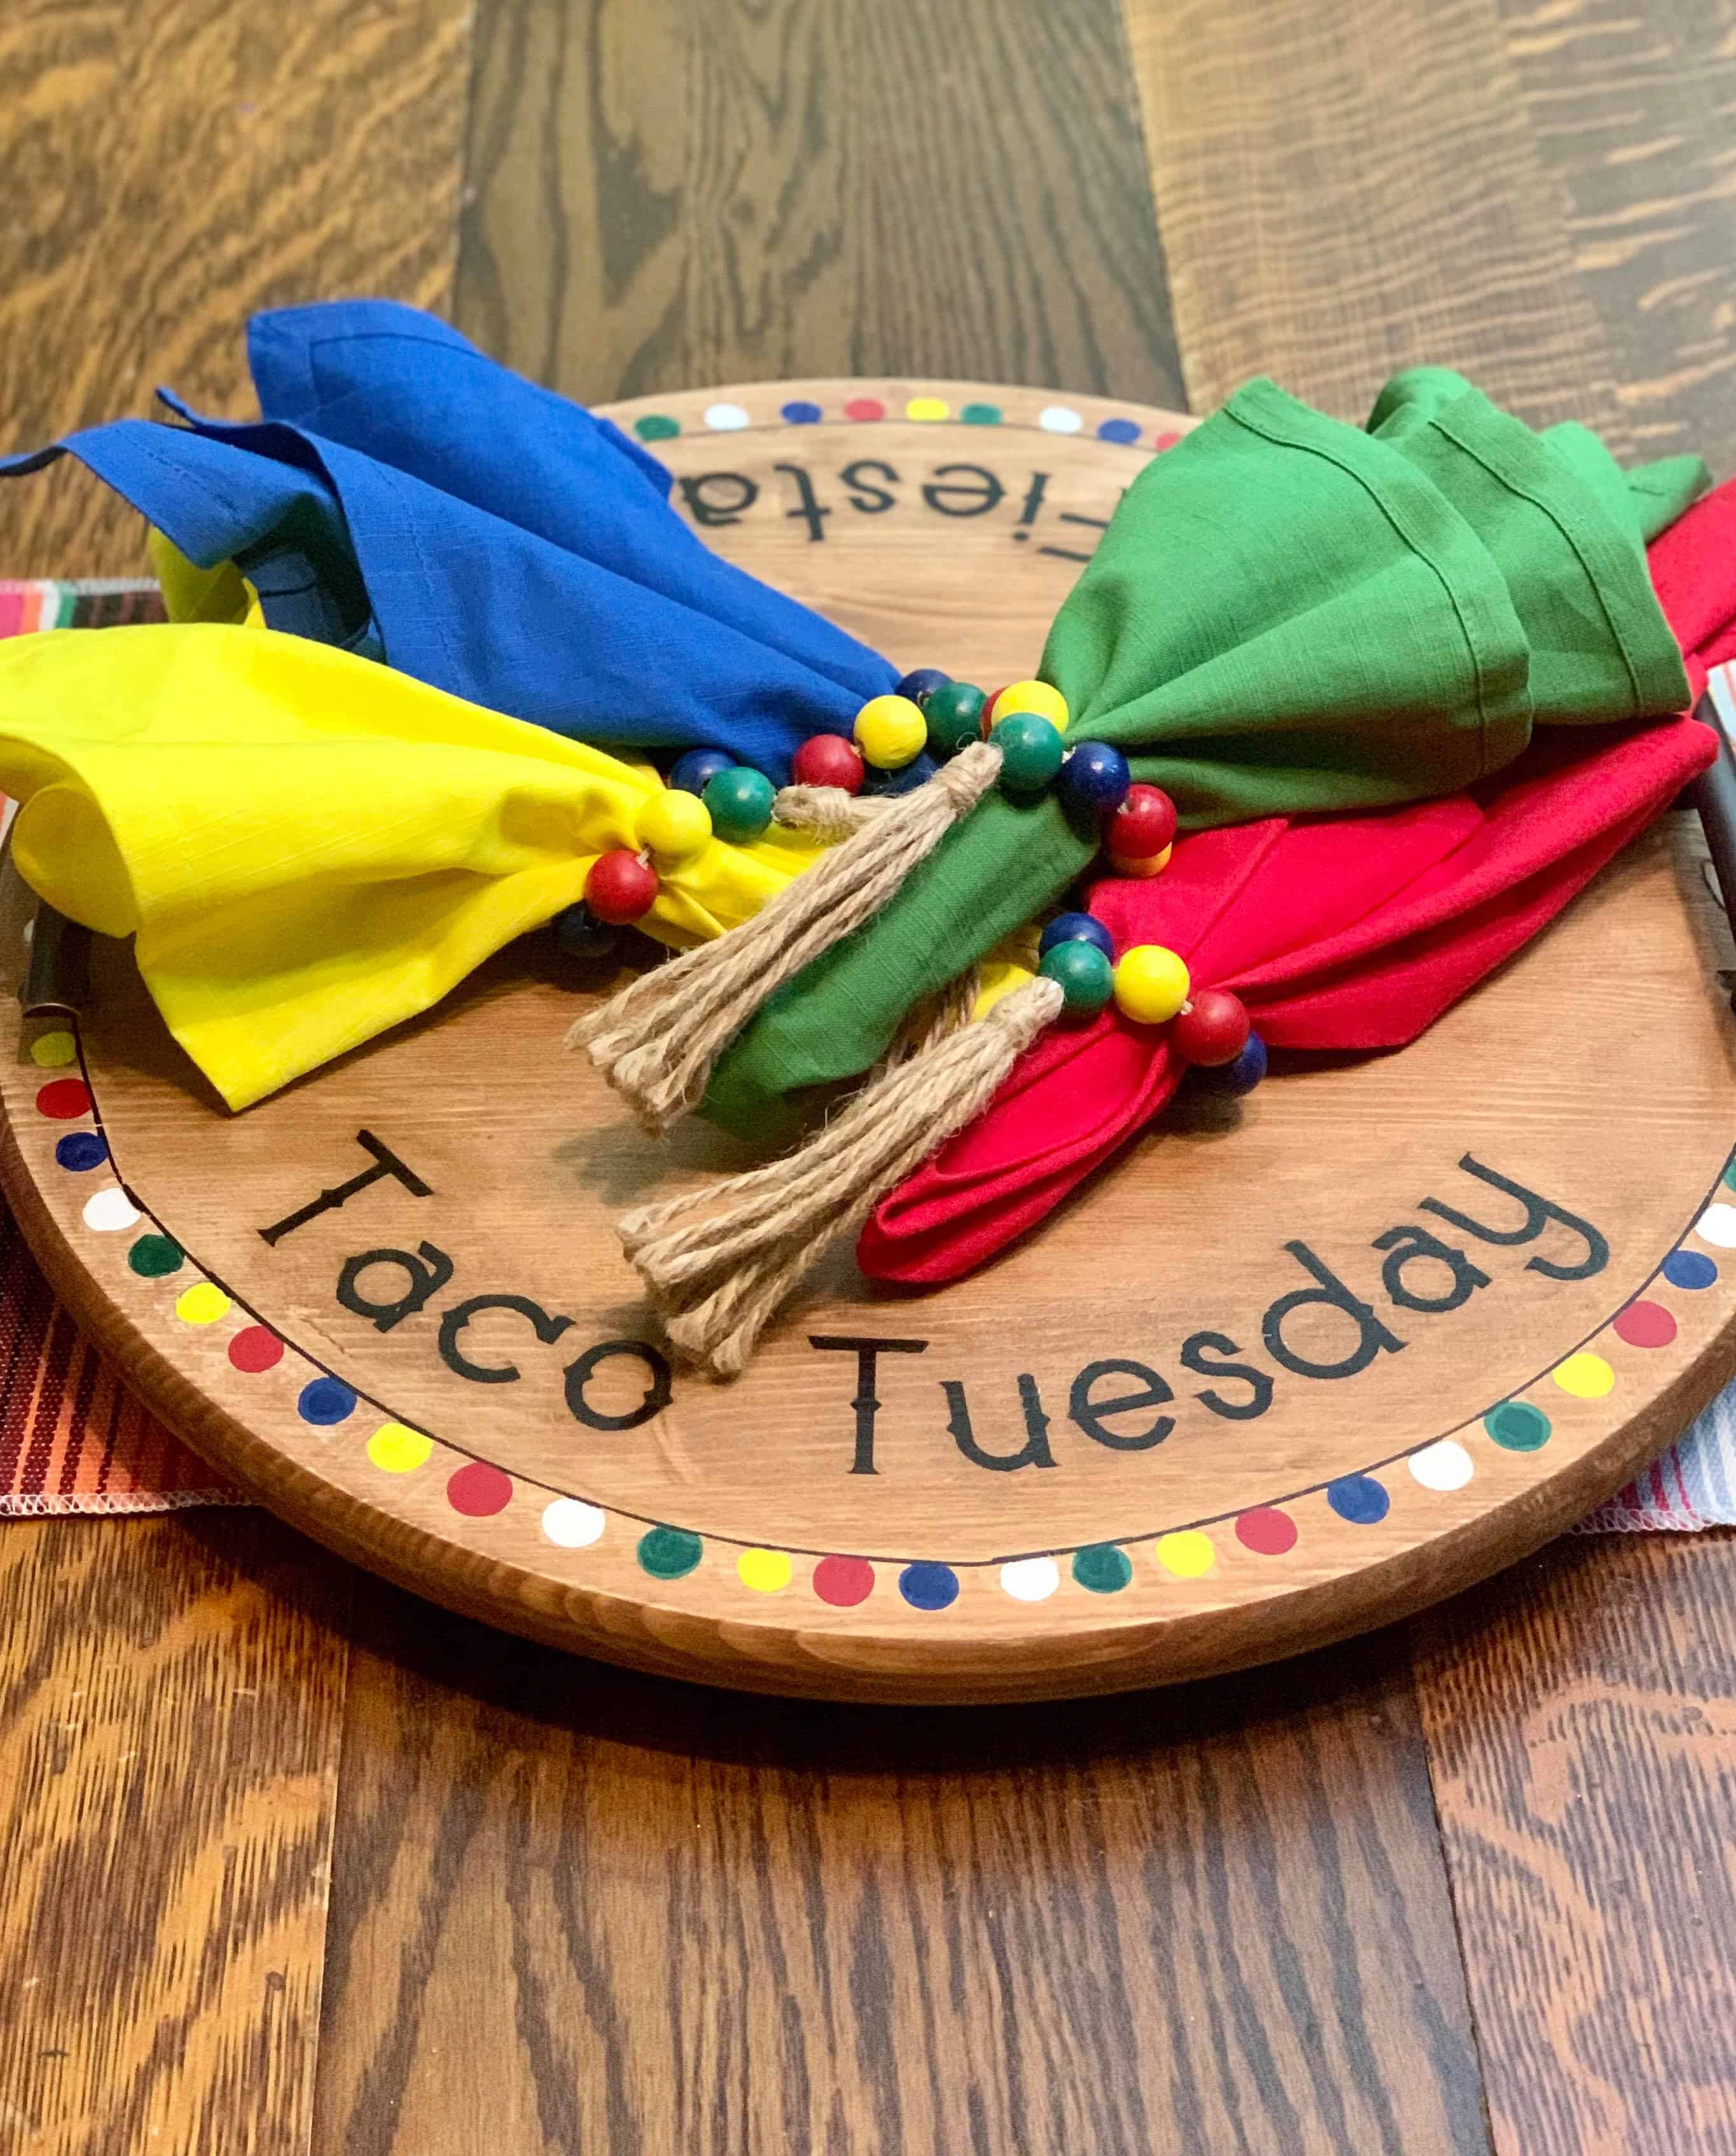
Anne’s Taco Tuesday Serving Tray
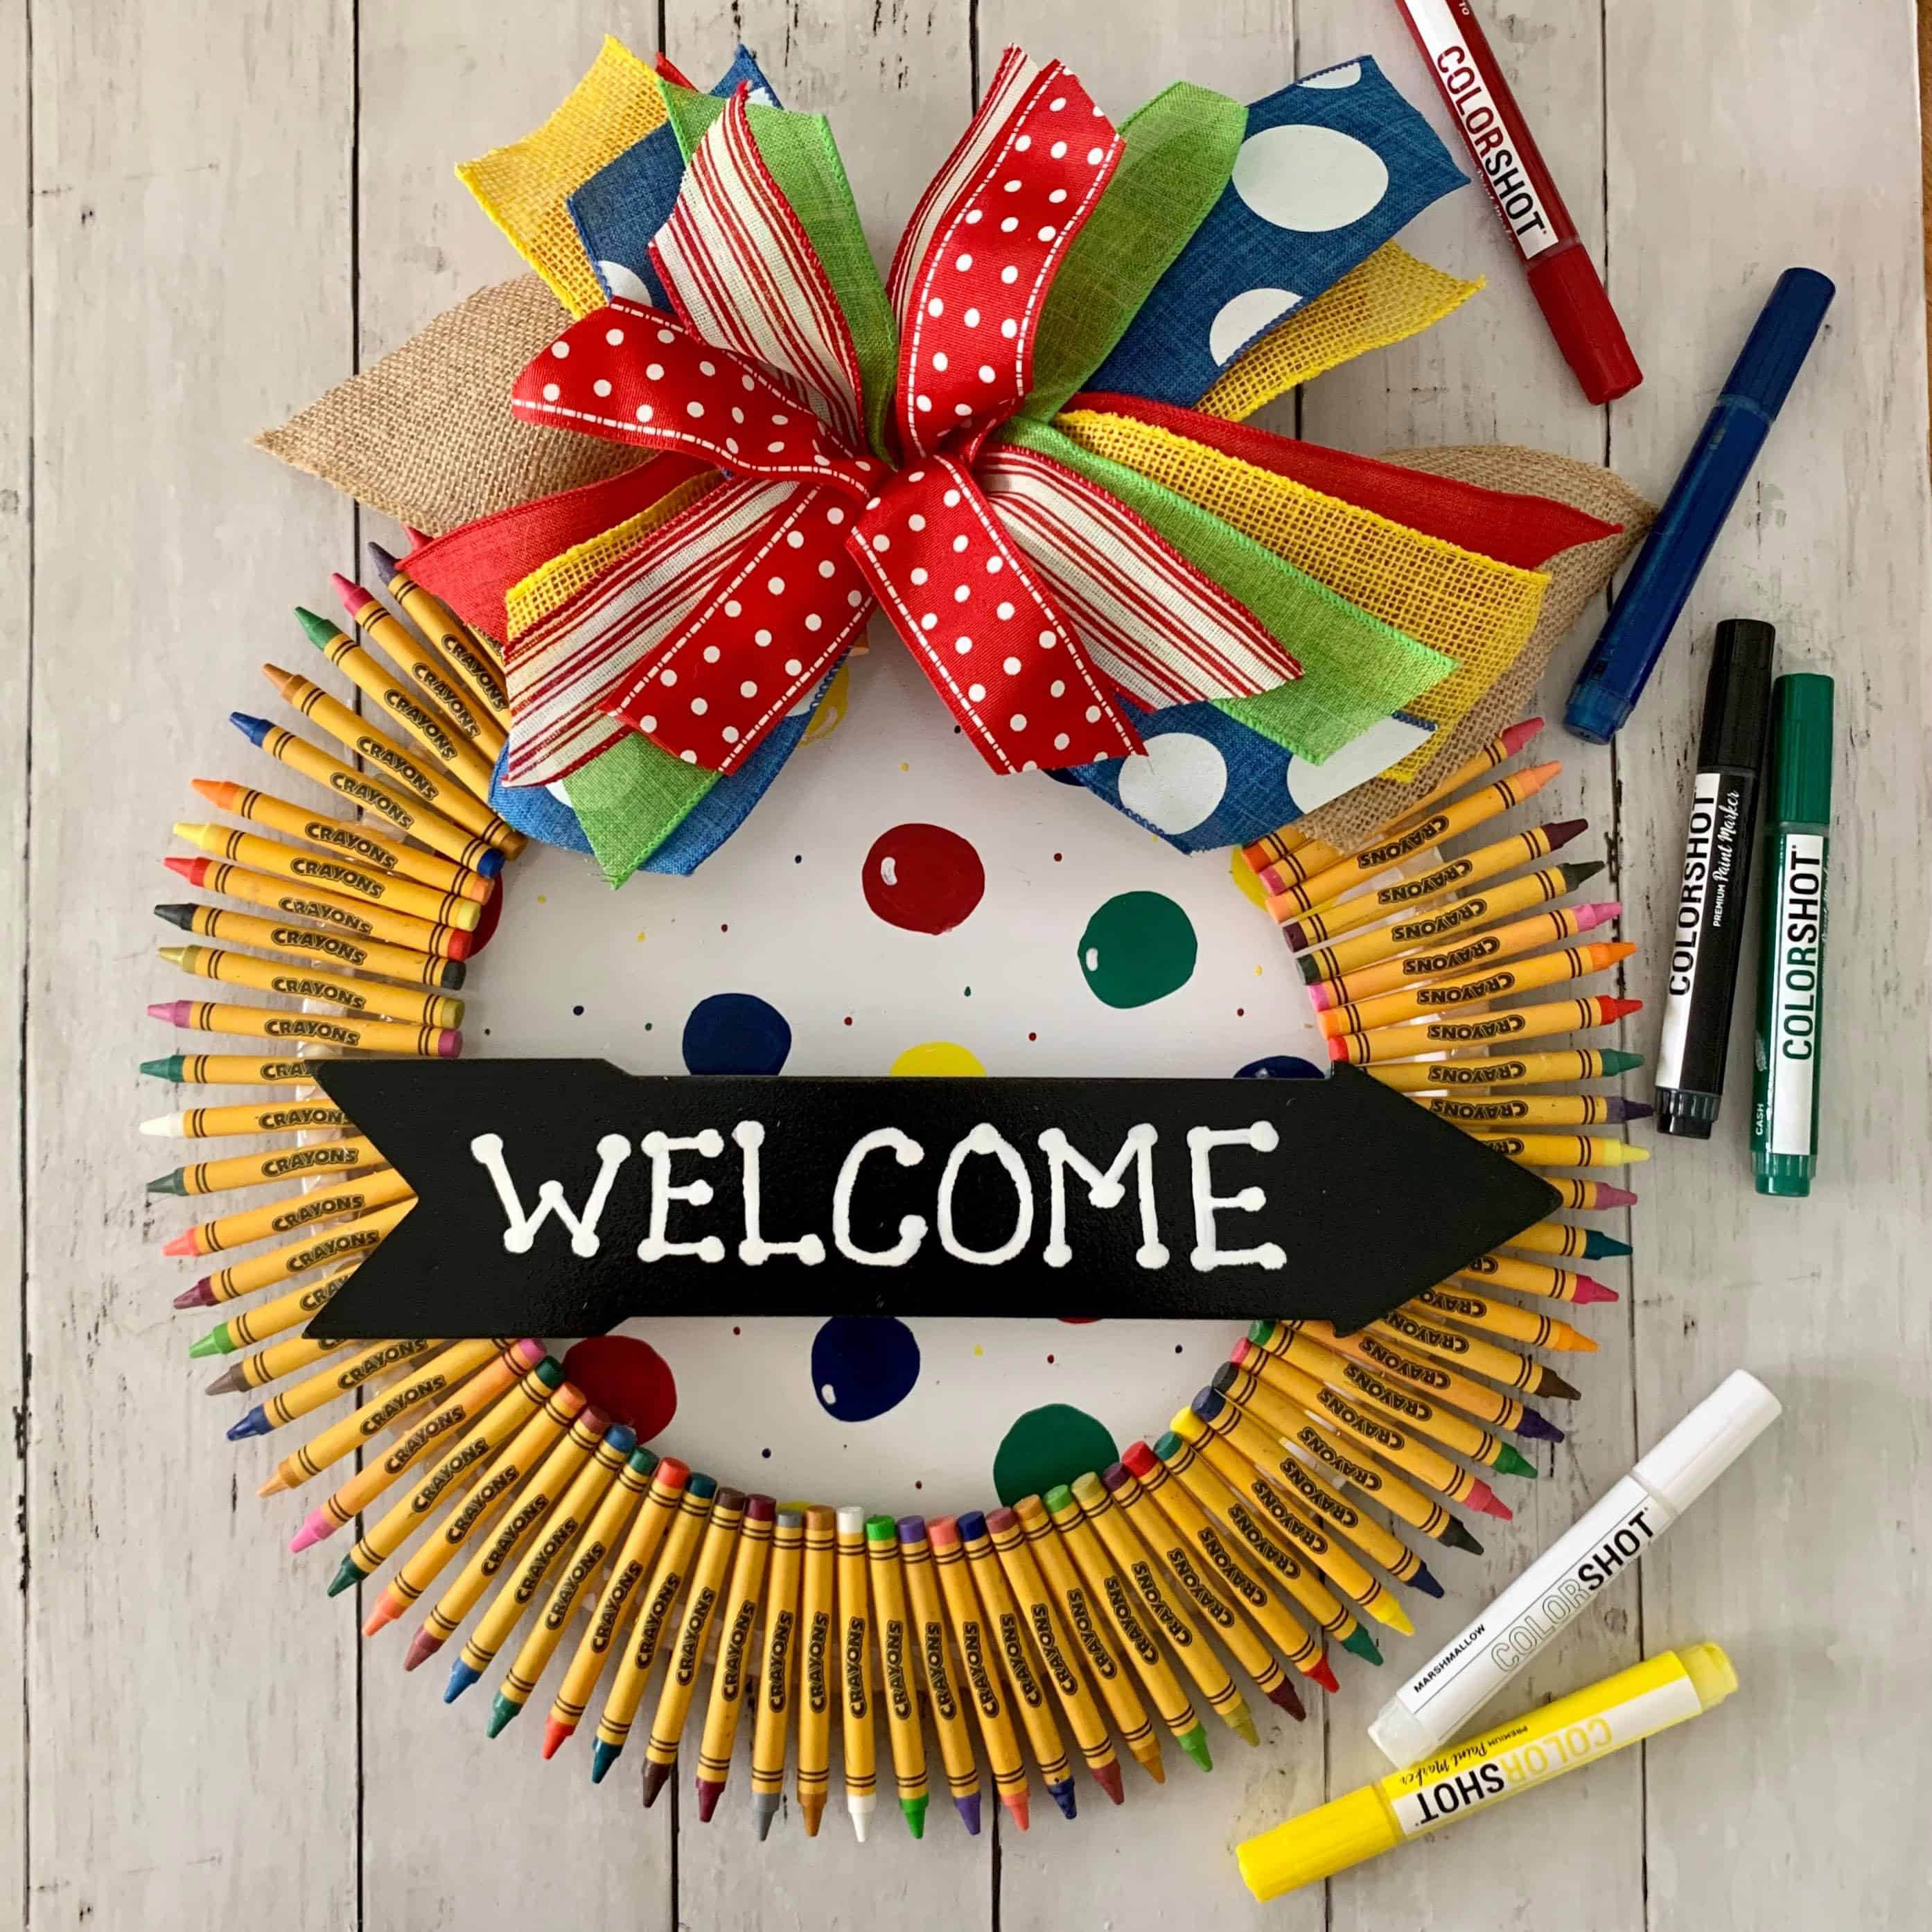
Leslie’s Back to School Crayon Wreath
PIN FOR LATER!


Hahahaha I love all your woes before the wreath came together! Story of my life! I truly love how your wreath turned out! It’s so cute and comical!
Nothing is ever as easy as it should be! I’ve gotta keep it lighthearted over here. I take life way too seriously!
I had a rough start with my project too! Looking at your project, I wouldn’t have guessed any of the troubles! The chalkboard is such a fun touch! Glad we were in this challenge together!
Thanks! I love how it came together. Everything I do has some sort of issue. I should come to expect it, but I guess I start off really optimistically!
I love this project!
Thanks! It was fun to do and fun to see on my front door!
Your sign turned out so adorable!! What a fun collaboration you ladies did together! Great work!! Pinned!
Thanks, Cindy! It was a fun group project, for sure!
It turned out great! Are those your kids’ school colors?