These wall hooks in a hallway have been a plan of mine since we moved into this house. We have lived with backpack and jacket chaos for 2 school years, but not any more! Backpack hooks have arrived!
When we moved into this house, I had no idea how the kids would operate when it came to homework and backpacks. Would they do homework in the basement or in their bedrooms? Would they take backpacks to their bedrooms or just leave them downstairs?
What I found was they leave their backpacks strewn about the living areas. Then when they would “put them away,” they were just throwing them in the floor of a closet in our entry way.
To get to our bona floor mop or to our favorite Shark vacuum, backpacks, lunchboxes, hoodies, etc. had to be moved out of the floor. It was a disorganized disaster!
*This post contains affiliate links. Any purchase you make through one of these links affords me the opportunity to earn a small commission. Thanks for supporting Yellow Cottage Living!
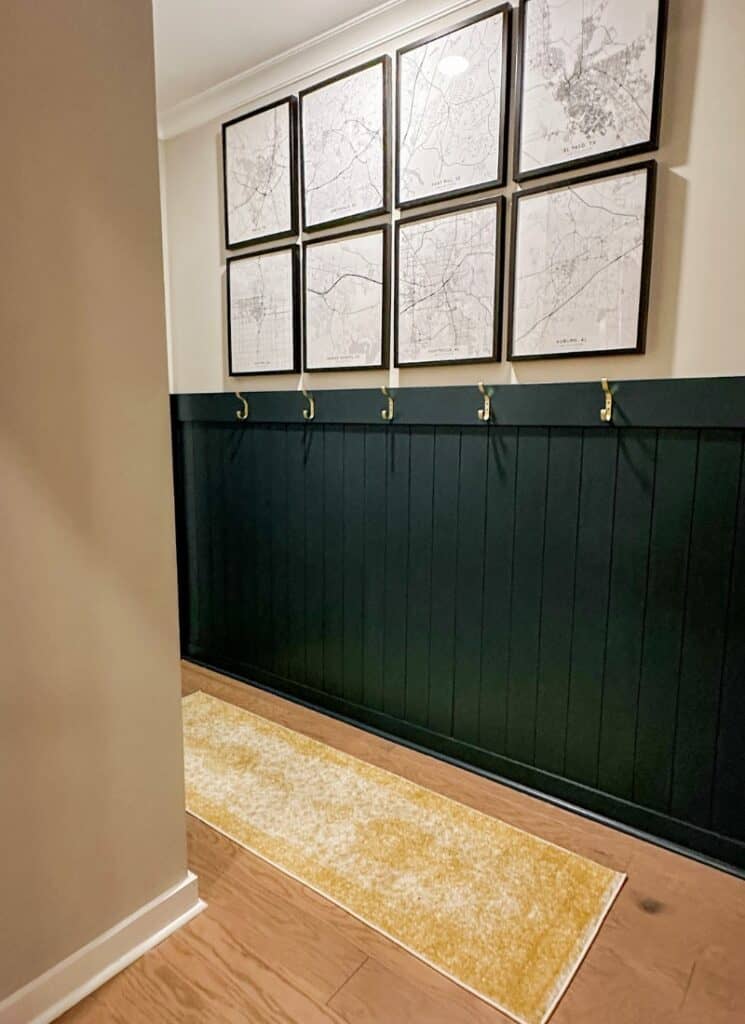
Wall Hooks In A Hallway Idea
The hallway between our main living area and our laundry room makes the most sense as the place for this backpacks hooks set up. It’s convenient for grabbing a backpack on the way out the front door to catch the bus. It’s also a little bit out of sight from the main living room, mostly!
Since there is some visibility into this hallway from the living room, the color and decor needs to be somewhat cohesive with the living room. Cue the green!
We stayed at this fantastic VRBO in Johnson City, TN last year when we took our son to college orientation. The owners and I have very similar style! They had painted the cabinets in the kitchen this beautiful green color. I was in love! That night I started scheming for where this green paint would work in my house…the future hook wall and laundry room, of course!
I also love the look of vertical shiplap and discovered that Home Depot carries a shiplap wall panel. Sign me up!
It took me a long time to commit to this project for various reasons. One of them was the size of these wall panels and not owning a table saw to cut them in half. They have to be cut in half to be able to make the “shiplap” run vertically.
I’m so glad that I bit the bullet! I absolutely love how this turned out! It’s one of those projects that I look at and am proud of how it turned out. I did that!
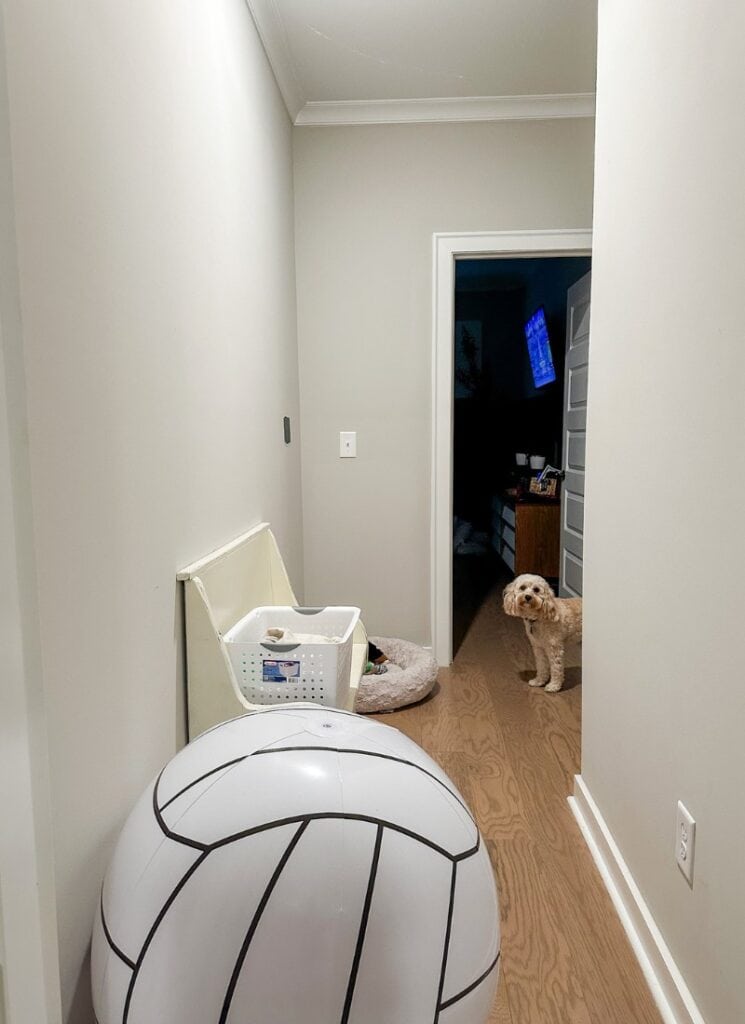
How to Create Your Own Backpack Hooks Wall
Step 1: Decide where you want to create your backpack hooks wall.
Depending on the size and layout of your home, you may use this set up in a hallway, mudroom, entry way or by the backdoor of the basement. The location really depends on how you function in your home and where you have space for this kind of hook wall.
Like me, it may take you living in a space for a year or so to see what kinds of habits you and your kids have. Clearly, this backpack hooks wall isn’t just a great solution for backpacks! Think purses, work bags, jackets, towels, etc.
Step 2: Decide what materials you want for your Backpack Hooks.
I knew I wanted a vertical shiplap look for my wall hooks in a hallway so choosing this wall panel was easy. However, wall panels come in other styles, like a traditional beadboard or panelling. Honestly, you could to this without using a wall panel at all.
The other major materials to decide on are the size of the board that will serve as the top horizontal piece that the hooks will attach to. Then, obviously, the hooks and the color of the wall need to be chosen.
For my project, I used a 1×4 MDF board for the top. horizontal piece. I chose these gold double hooks.
I already mentioned I was set on a green color. After a little Pinterest research, I landed on SW Cascades. It’s a beautiful dark blue-green.
Step 3: Measure Your Wall and cut Your Materials
This is the part of this project that made me most nervous!
Since I knew I was going to need to cut my wallboard panels in half to achieve the vertical shiplap look, cutting the panels in half also dictated how tall each individual panel would be and dictate the height of the whole wall treatment.
My wall panels ended up being about 47 inches tall because we had to trim an inch or so off of each end of the large pieces because there was some damage to the edges of the boards.
To cut the panels, we used a Kreg Accu-Cut Cutting Jig. This contraption worked for the most part since we don’t currently own a table saw. There was for sure a learning curve with this.
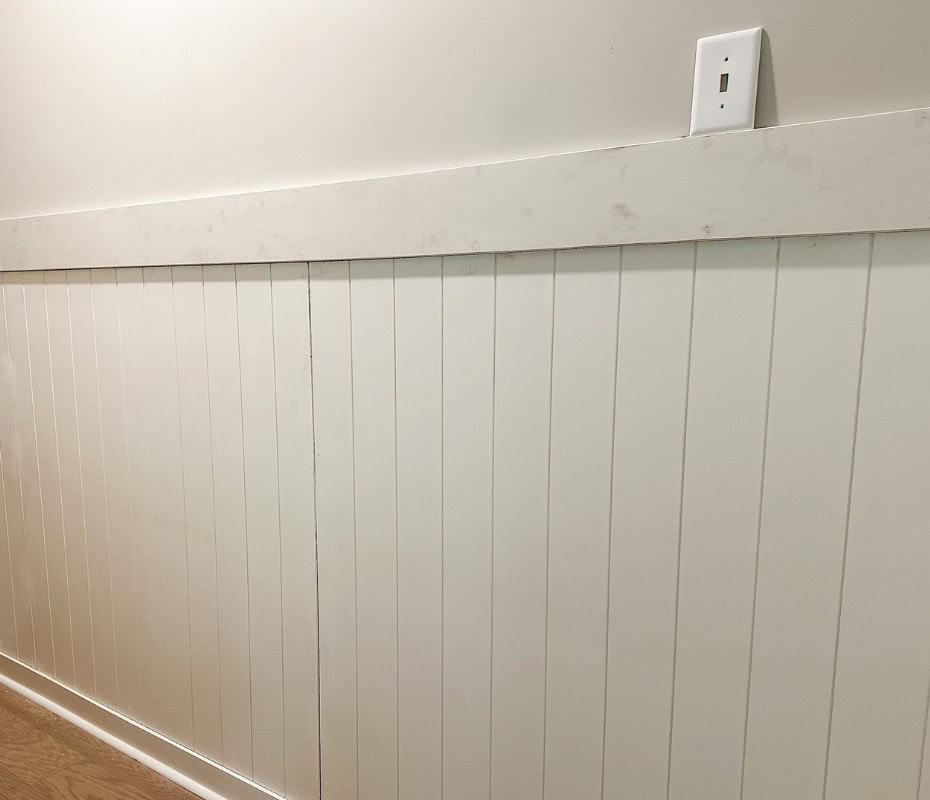
Step 4: Install Backpack Hook Wall Elements
Start by installing the first wallboard panel. The panel will need to be straight at the top and sit as snug to the baseboard as it possibly can. If this first panel isn’t level, all the other panels and the horizontal board that will go across the top will be wonky!
To get our first piece level, we had to sand a bit off the bottom in spots. We weren’t ever able to get it to fit perfectly flush on the bottom, but we able to get it level on the top. See Step 5 for the solution of the small gaps at the bottom!
We attached our wall panels to the wall with my favorite Ryobi cordless brad nailer!
Once that first piece is secure, the other pieces will go fairly well, as long as they were cut straight!
Keep in mind that when installing these panels, you will encounter crooked walls, baseboard caulk that will keep wall panels from sitting flush against the baseboard and a myriad other issues in our imperfect homes!
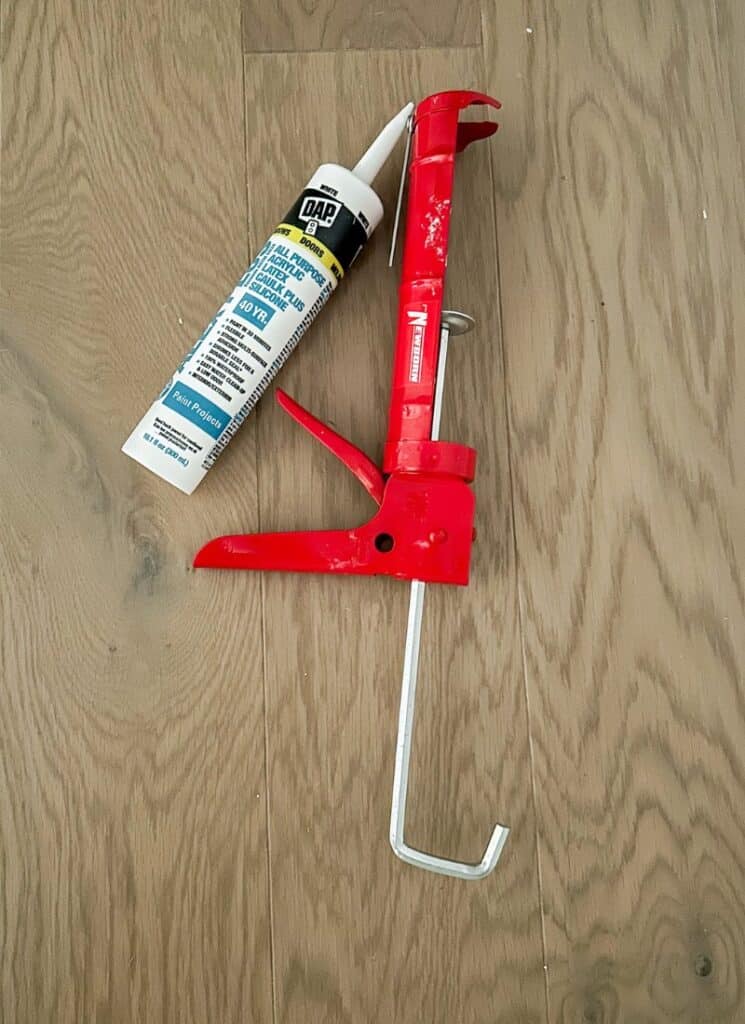
Step 5: Caulk and Paint
Caulk is your friend, but it’s also one of my least favorite DIY things to do. It can be very, very messy!
Use a small line of caulk to fill the gap between the bottom of the 1×4 and the top of the shiplap wall panels.
Caulk is also helpful in filling the gap between two wall panels that may not line up perfectly.
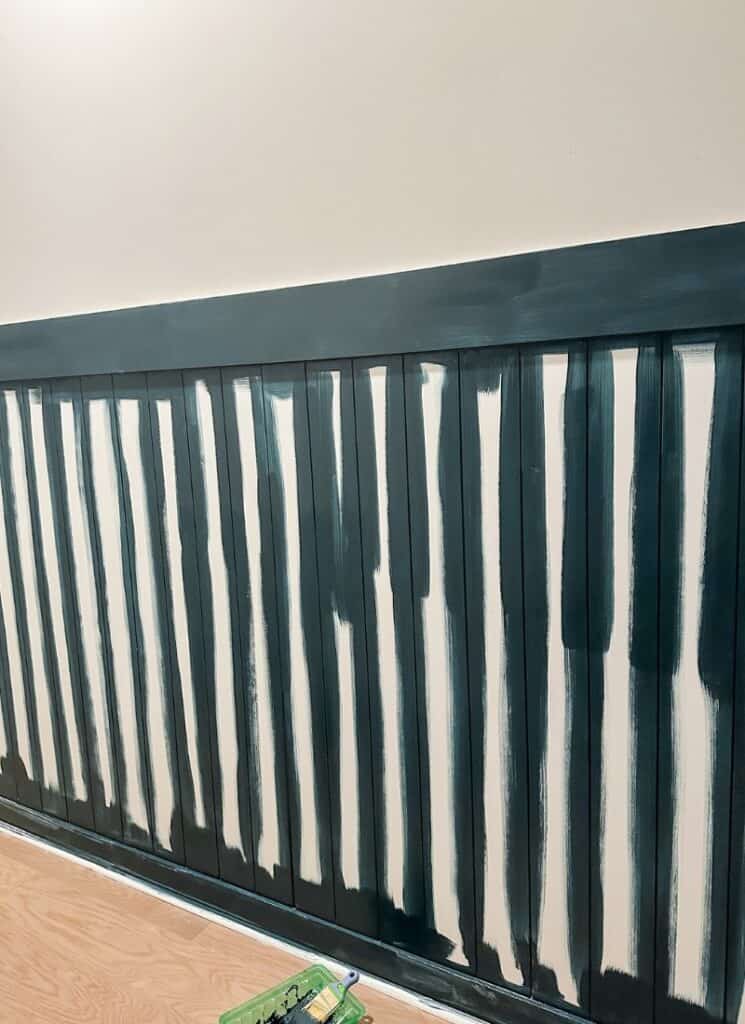
Once the caulk is dry, it’s time to paint!
For these shiplap panels, we used both a brush and a roller. The brush for edges and the gap between each faux shiplap board and a roller for all the flat areas.
I hate to tape so I often skip that step unless I need a “good” straight line!
Step 6: Hang wall Hooks on Top Horizontal Piece
The whole purpose of this wall in my house is to hang backpacks, purses, jackets, etc. Wall Hooks were one of my primary considerations.
Placement of the wall hooks depends on the length of the wall and how much space is desired between each one.
I also took into consideration that my kids’ backpacks would be heavy. I bought longer screws and chose to screw each of my hooks into the 1×4 and into a stud. They ended up being about 16 inches or so apart.
There are myriads of wall hook choices out there – different colors, different shapes, double hooks, single hooks. The hook decision is in the eye of the beholder and should be based off of what will be hung on the hooks.
If just hanging a towel, there’s no need for super heavy duty wall hooks. I chose these gold ones because they were rated to hold about 50 pounds each, if I remember correctly.
Step 7: Decorate the rest of the space
Once the paint is dry, the hooks are screwed into the top board, it’s time to make the space pretty!
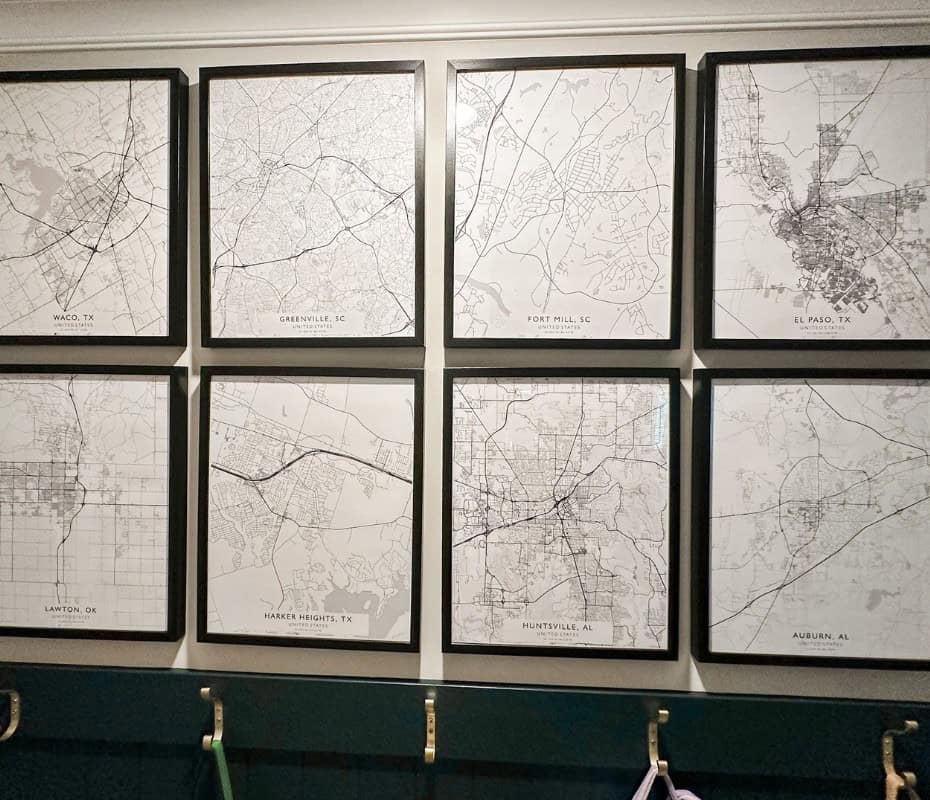
For me, I chose to fill the space above with these map prints of all the places that we’ve lived in the last 20 years or so. These were in our bonus room in our last house so these were an inexpensive, almost free, wall decor element.
I also wanted to add a pop of color with a rug. This gold rug worked out perfectly! The contrast off of the blue-green walls was just what I wanted!
I still need to install the light plate cover, but that’s the final decor element in this space – unless I decide down the road to add a pretty light fixture!
Step 8: Step back and admire your accomplishment
Honestly, this project was not as simple as I thought it was going to be. Part of that was just nailing down my son to help me cut the wall panels!
We didn’t give up and are in love with this fun and practical hallway!
Could you use wall hooks in a hallway (or entry way) at your house to keep your backpack chaos at bay?
Shop the Post




Leave a Reply