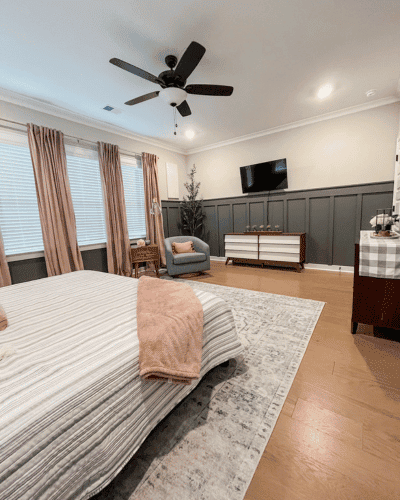
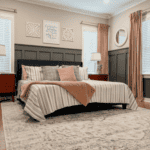
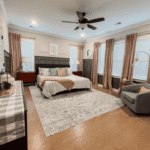
It may have taken what seems like forever, but I’m glad to say that I was able to create an elegant master bedroom on the cheap. We overcame a few hurdles – mostly life and schedules – but we got it done and I couldn’t be happier with the finished product. I’m in love with my new master bedroom decor!
Now I know I’ve been dragging you along with this whole thing. I’m incredibly grateful you have stuck around for this final update. I’m not using the word finished because a couple of details will take me time to iron out.
*This post contains affiliate links. Any purchase you make through my links allows me to earn a small commission at no additional expense to you.
Analysis Paralysis and just sheer mental exhaustion are the name of the game at this point. I can’t make any more decisions. I can’t look at one more sconce or order one more thing from Amazon. The credit card company is sure to wonder who took control of this card over the past 2 months!
So we’re using the word “finished” in quotation marks because most realize that our homes are a continual work in progress.
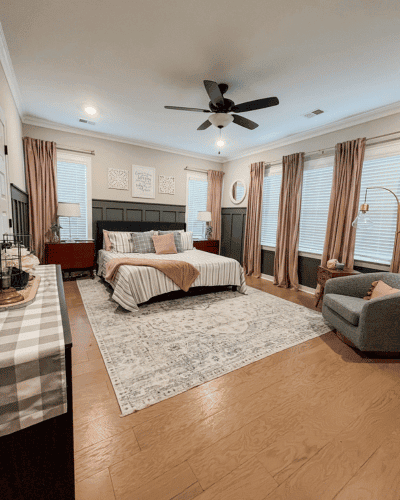
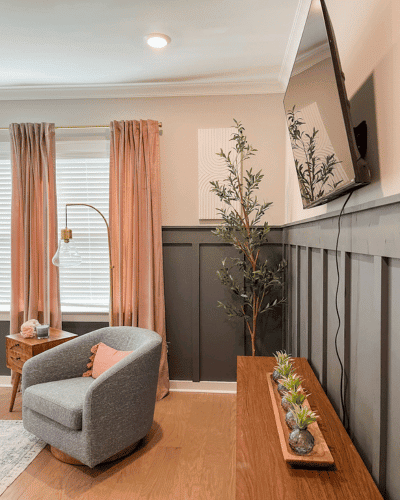
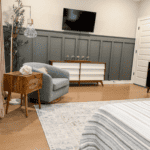
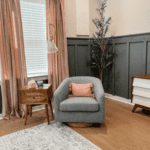
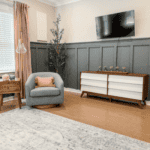
Master Bedroom Board and Batten
The walls have been painted for several weeks. If I’m being honest, any project that feels permanent scares me a bit!
There’s something about nailing boards to the walls that gives me a little pause. My perfectionism freezes my ability to move forward quite often.
What I learned this go around is that these boards can be pryed off the wall, leaving only a few little holes that are easily patchable. Ask me how I know!
The big challenge with this whole board and batten or trim, whatever we want to call this, is placement! There are 6 different walls in this room with 6 different dimensions!
We decided to just start with the wall behind the bed and determine our measurements between the vertical pieces. For all the other walls, we would just have to make it work!
I’m definitely not going to give a step-by-step tutorial on how we did this because we have no idea what we’re doing!
But I will tell you that we used a 1×2 for the top “shelf” piece, 1×6 for the wide trip along the top and our vertical slats are 1x3s. Our boards are about 13 inches apart. We cut a piece of 1×2 to use as our measuring tool between each vertical 1×3.
If I had to do it all over again, I would’ve sanded every board and used a satin finish paint. Since I was just at the point of wanting this done and off my to-do list, I didn’t take the time to sand as well as I should’ve. Beginner’s mistake!
The effect is still there, but sanding and satin paint would’ve created a more slick and finished look. But honestly, seeing the imperfections in the wood adds some character and reminds me that imperfect things can still be beautiful! If only I could say those words to myself when I look in the mirror every day!
I also need to go back and caulk the edges where the boards meet the walls, but that will be one of those “maybe I will, maybe I won’t” projects!
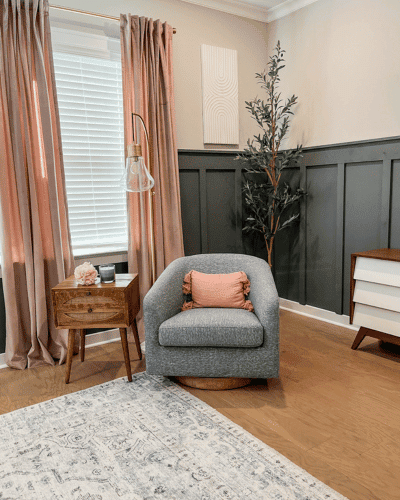
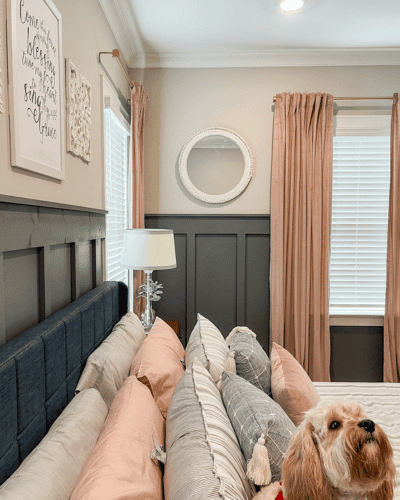
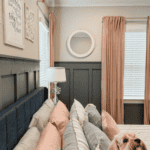
Master Bedroom Wall Decor
This is where my analysis paralysis really reared its ugly head!
I’m still undecided as to what my end goal is for wall decor in here. I have plans to create some sort of artwork of my own above the bed and I have a vision for some new framed hymn prints like I had over the piano in the Yellow Cottage.
To just get this done, though, I shopped the house. Fortunately, but not really, I have a lot of my own stuff to shop. So not only did my walls get some decorating, other places in my house got some updates, too!
The mirror and grey macrame wall hanging were both clearance finds at Hobby Lobby.
I do like that these wall decor pieces, in general, add some softness in contrast to the more moderny, mid-centuryish furniture pieces.
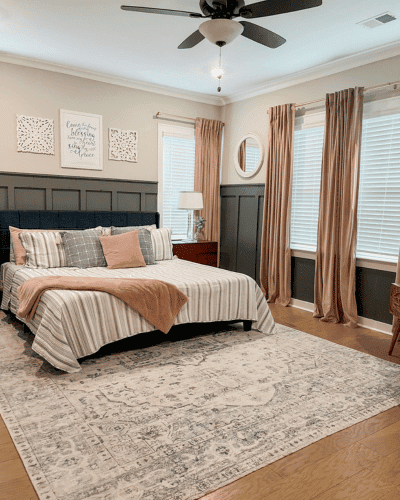
The Come Thou Fount print came from The Turquoise Home’s collection of printables. I’ve had this for years and it’s moved to various frames and locations in my house through the years.
I’m sure the wall decor will evolve over time in here. I’ll keep you posted.
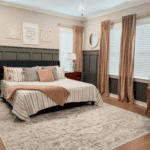
Future Plans for the Master Bedroom
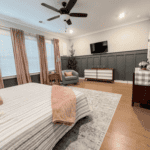
2 things that are still on my to-do list before I’ll feel like this room is totally complete are hiding the TV cord and some sort of sconces above the bed.
I guess a 3rd thing would be dealing with the cords under the nightstands. Honestly, I forget about those cords except for when I’ve had to move the nightstands to paint or hang boards!
I ordered this contraption this week to hide the cords. Seems simple enough! That’ll be a weekend project for sure.
I’m still undecided on sconces – plug in, rechargeable bulbs with a remote, or just get new lamps!
Here’s my biggest hang-up with the sconces – how hard it will be to turn them off and on? That’s what’s got me most tripped up! It’s the dumb things, y’all! But I don’t want to have to get out of bed to turn a sconce off and I don’t want to have to be a contortionist to reach the power source!
I’ll for sure keep you posted on what I decide to do!
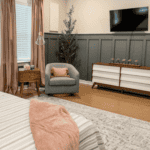
Putting this Project to Bed
Truly, I’m so glad I took this room on first in the new house.
We are all – kids and Bentley included – enjoying this room. The kids come to hang out with us at night, now more than ever. One will lay on the bed with us. Another will sit and twirl in the chair. Honestly, there are nights when we have to force them to leave!
I think they’ve enjoyed seeing this come together as much as I have.
On to the next project…which is actually already in motion!
Thanks for following along. I hope this has inspired you to create spaces in your home that truly give people that sense of a hug!
Shop My Master Bedroom


Leave a Reply