This Music Covered Monogram is a great personalized gift for any music lover in your life! Read on to see how easily I created this W!
- This Post Contains Affiliate Links. Any time you purchase a product through my links, I receive a small commission.
Several years ago, I bought a large W at Canton Trade Days. I wasn’t sure exactly what I would do with it, but had been looking for an oversized W for a while.
We, my husband and I, both come from musical families.
As a matter of fact, both of us are musical or were musical. Jake played the Tuba and was drum major for his high school band and for Carolina Crown Drum and Bugle Corps in his younger days.
I took over as the pianist at my church in TX when I was 15. I traveled with Life Action Ministries for a couple of years while I was trying to figure out what I wanted to do with the rest of my life. I still don’t know, honestly. Since then, I’ve played keys and sang in a variety of praise teams and choirs. I think I’m officially in retirement from all that, though.
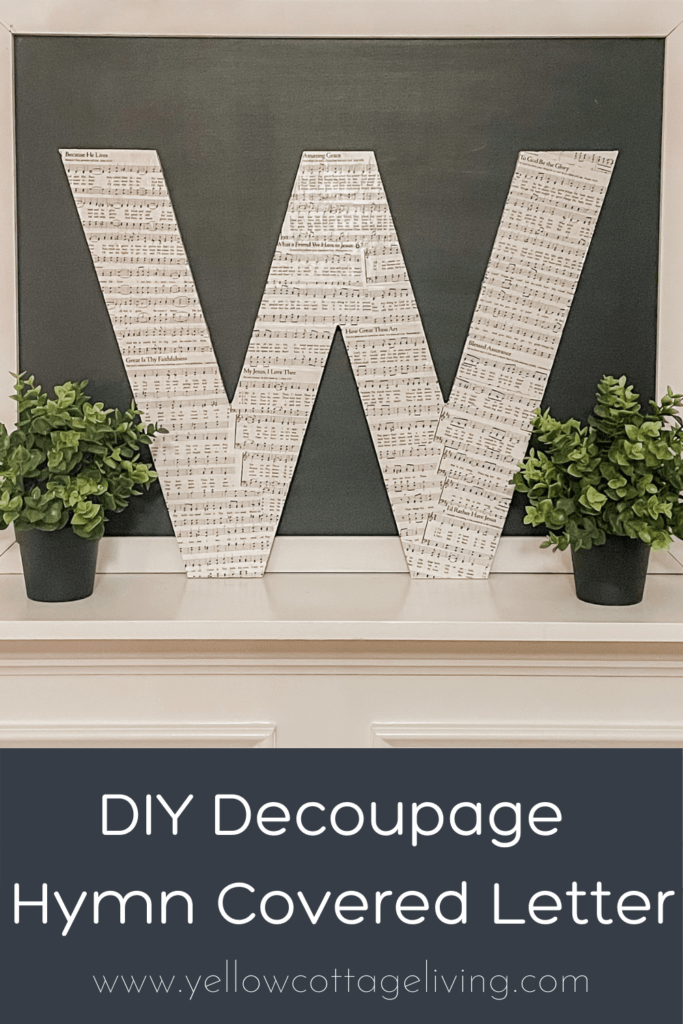
Back to the large W I bought in Canton…To incorporate it into my decor, I took an old hymnal that belonged to my grandmother, who was a self-taught, very talented pianist, and decoupaged a variety of hymns all over it. It ended up being a beautiful decor piece in our kitchen 3 houses ago!
My husband’s dad spent about 42 years as a music minister. He had a beautiful baritone voice and had a heart for people like no one else I’ve ever met. He could make a friend everywhere he went! He was also a talker!
After he passed away in 2014, after a long battle with kidney cancer, my mother-in-law gave me the hymnal he used every Sunday morning to lead the choir. The intent was for me to use the pages of that hymnal to create her a hymn covered W. A few years ago, I even bought a large W to tackle this project but ended up using the W I bought on my own mantle. Oops!
So here I am, almost 7 years later and I still haven’t made her W. Well, after today, that’s no longer the case!
We’ll be meeting her at the beach in June to celebrate her birthday. She’s also moving into a new house toward the end of the summer. I’ll hand-deliver this gift to her, that’s no longer a surprise!
This music covered monogram W will be the perfect birthday/housewarming gift for her.
(Debbie, act surprised when I give this to you in person!) 🙂
My intention was to complete this project for a DIY gift round-up last month, but in true Jen Wade fashion, I forgot to order my W and it didn’t arrive until after the challenge was over.
You ready to make your own hymn covered letter?!
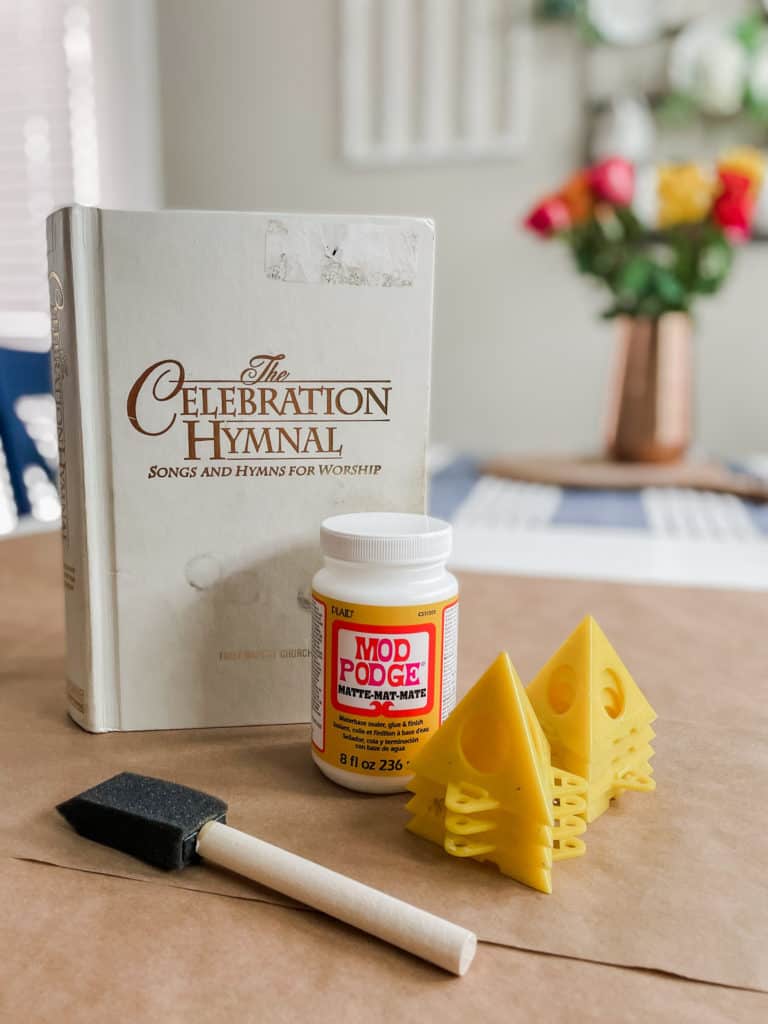
DIY Music Covered Monogram Supplies:
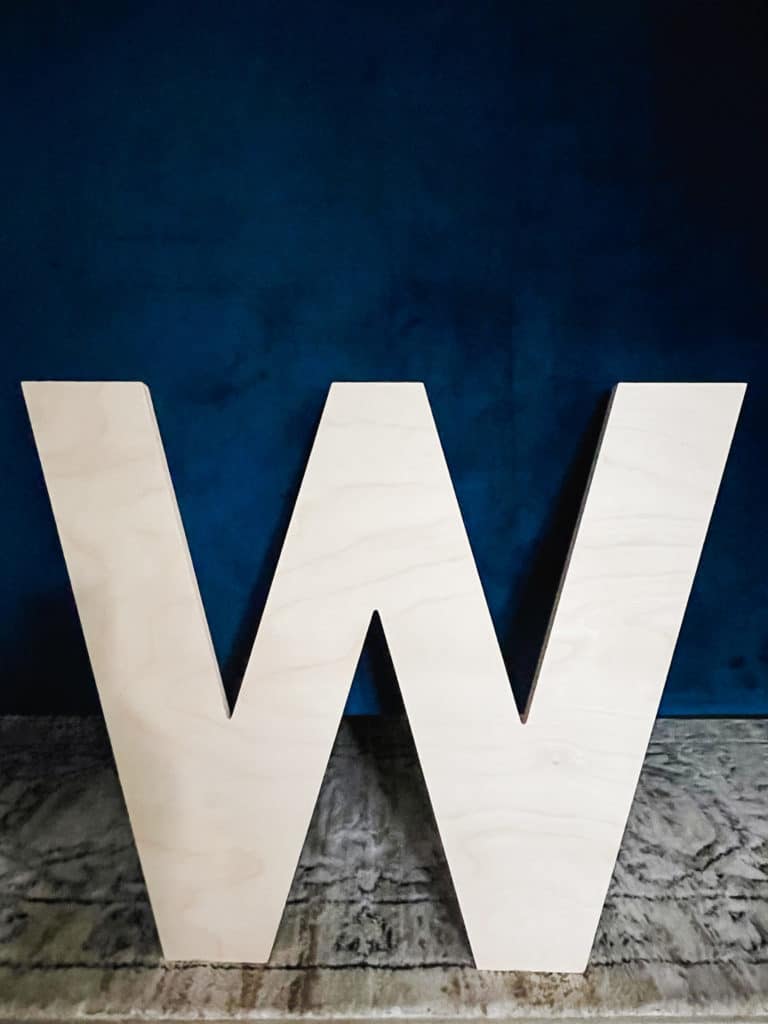
18″ Unpainted W – Purchased mine from Craft Cuts
DIY Decoupage Hymn Covered Letter Instructions:
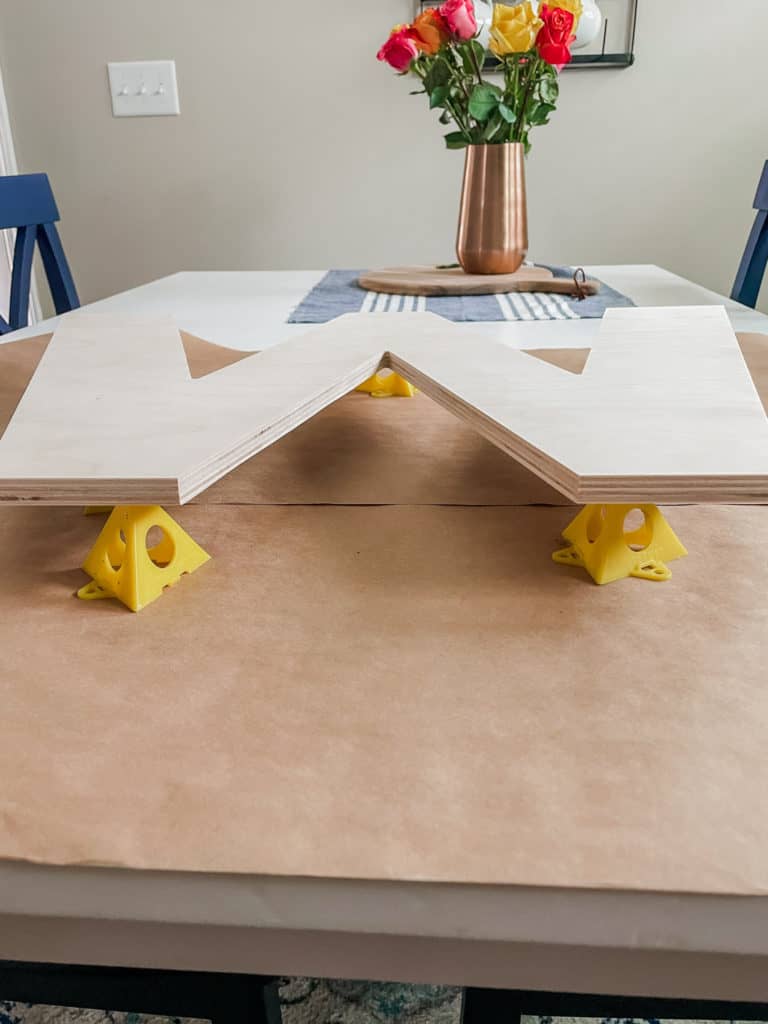
1. Cover work surface with masking paper or newspaper.
2. Place wood letter on top of the Painter Pyramids on the covered surface so that the letter is raised up.
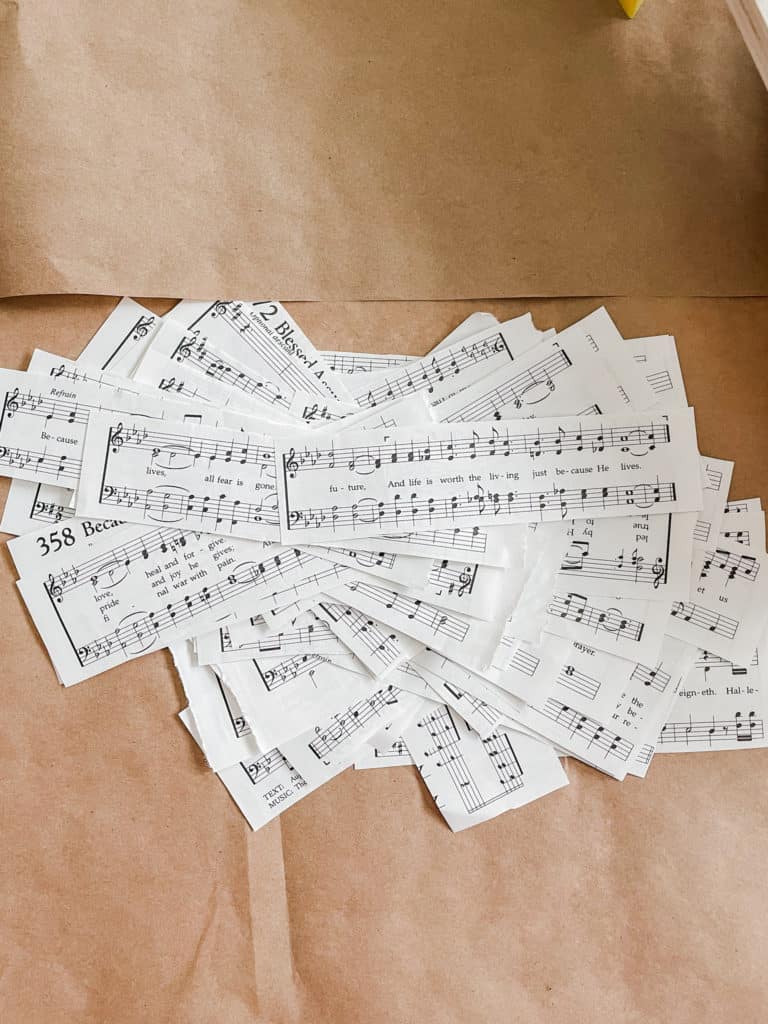
3. Choose favorite hymns from the hymnal.
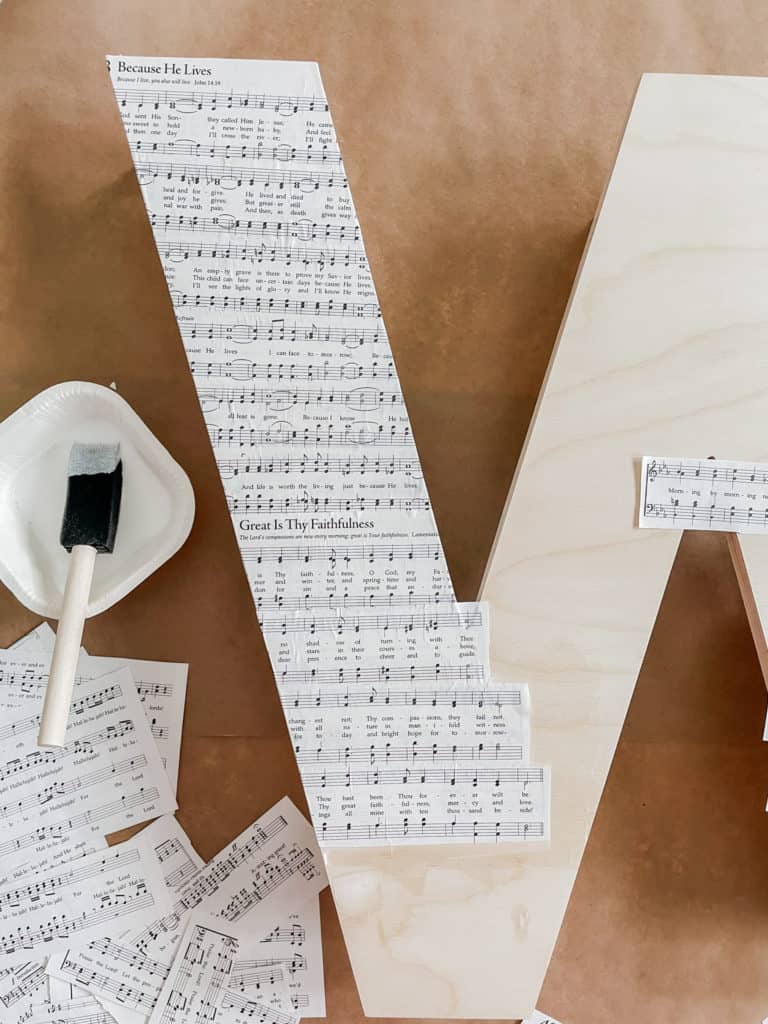
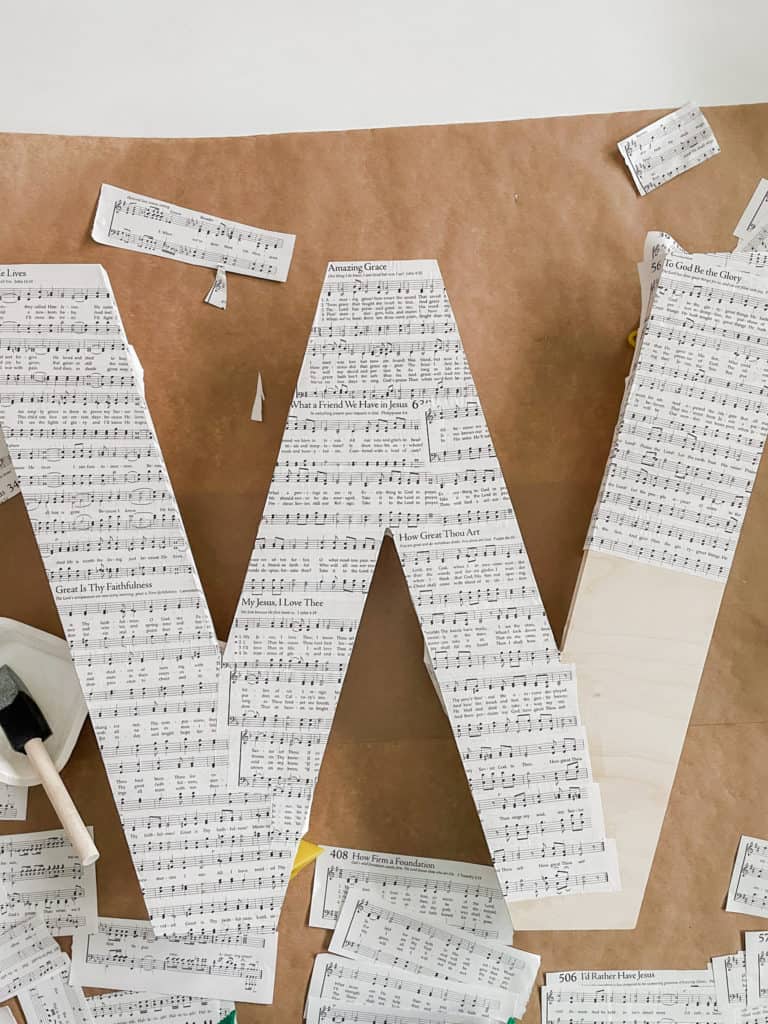
4. Cut favorite hymns out of the hymnal and then each hymn page cut into strips between each line of the song. For my 18″ tall W, I used 9 different songs.
5. Starting at the top of the letter, apply a layer of mod podge, or another decoupage medium, to the wood letter, on the surface facing upward and on the side edges, the size of the strip of music being applied to that spot.
6. Lay a strip of music onto mod podge.
7. Use a credit card or similar flat tool to gently press any wrinkles or bubbles out of the paper so that it lays as flat as possible.
8. Repeat steps 4-6 until you have your letter fully covered.
9. Let the letter dry completely.
10. Flip letter over to deal with the excess paper hanging over the sides.
11. For the paper hanging over the sides and onto the back, there are many ways to handle this step. 1 option is to trim the paper so that very little is overlapping on the back and use mod podge to secure the edges to the back of the letter. Another option is to leave the edges long and use mod podge to secure the edges to the back of the letter. This is all personal preference.
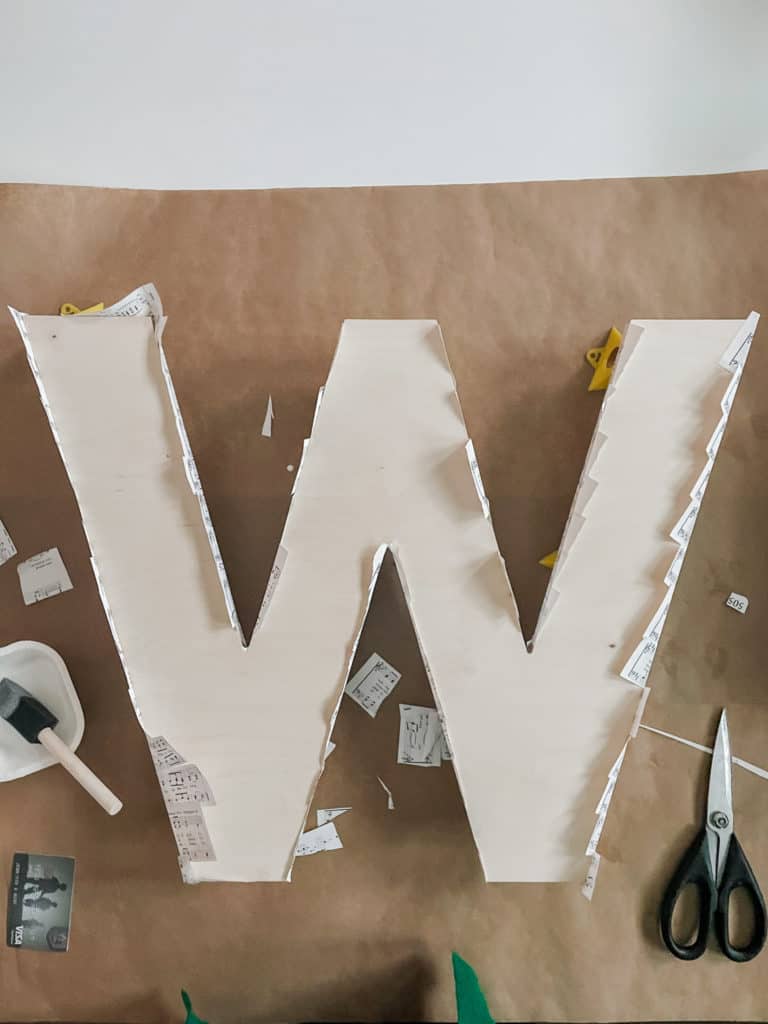
12. Once the back is dry and all paper is secure, flip the letter over so that the fully covered front of the letter is facing up.
13. Apply a layer of mod podge over the top of the hymn covered letter. Let dry 20-30 minutes, or as long as instructions on the mod podge container say. You can repeat this process as many times as you want, based on your desired sealed effect.
14. Let dry completely.
15. Display your beautiful hymn covered letter in a prominent place in your home to be admired by your family and friends.
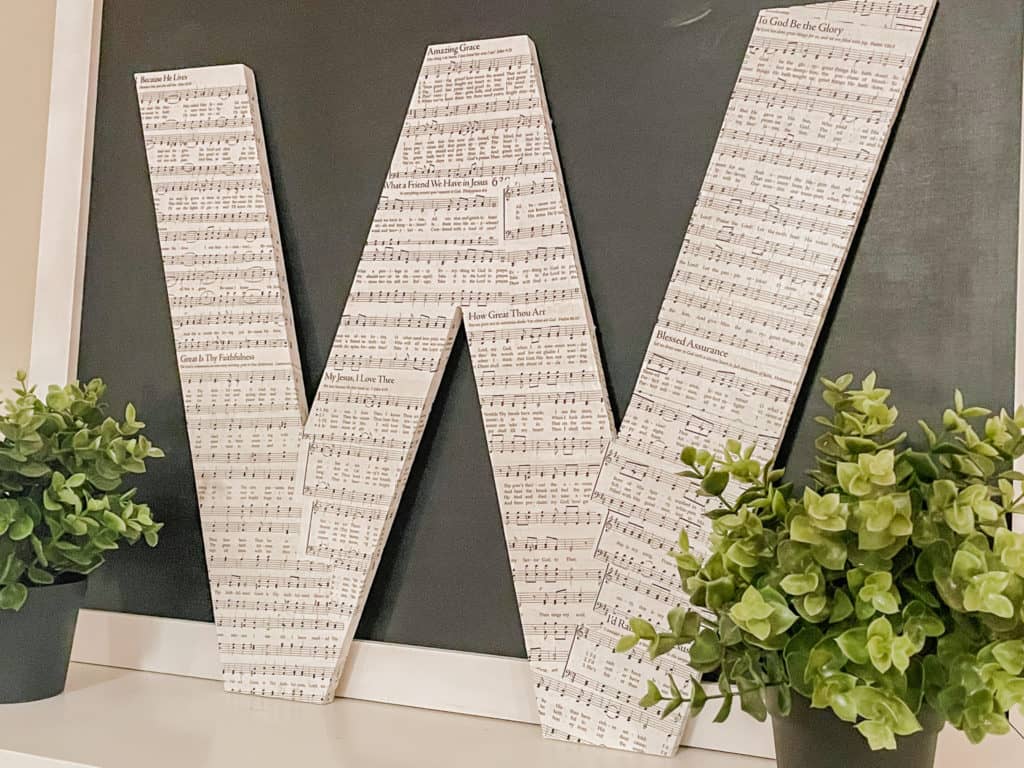
This is such an easy project, once all the supplies are gathered! Definitely would be a fun gift for the musician in your life or simply cover it with book pages for your favorite bookworm!
Pin For Later


What a lovely story! I love how you made the hymn covered letter, I’m sure your MIL will love it too!
What a meaningful gift to give your mother-in-law. Using your father-in-law’s hymnal papes to decorate the W is such a great way to keep his memory alive.
This is such a wonderful craft to make and gift to give! I like to craft with sheet music yet I have not used a letter as my base. How creative!!! Thanks for sharing:)
What a sweet, sentimental idea. She will love it.
Love this DIY! I have a “W” myself I need to dig out and use for this. Thank YOU!
Oh I love that this is a sentimental craft. It’s just beautiful. Worth the wait!